Quite often, I'm being asked to provide an option for cascading drop-down lists that also filter based on the selections made by the user on the previous drop-down list. A few examples when this could be asked are filtering countries based on region selected, filtering schools based on district, filtering departments based on divisions, filtering parts based on model vehicle, and many more.
I'm going to give an example for region and country. You can replace this with any other options that fit your needs.
You are going to need the following:
- 2 custom lists (one of the region and another one for the country)
- Document library or list that will use the 2 custom lists mentioned in the bullet above
- Document library where to save your code to
- jQuery (you can download it from here: http://docs.jquery.com/Downloading_jQuery)
- SPSServices jQuery (you can download it from here: http://spservices.codeplex.com/releases)
I managed to make it work using jquery-1.8.1.min and jquery.SPServices-0.7.1a.min. You may want to try other versions if it doesn't work for you. Sometimes it's a bit of trial and error, like with many SharePoint things.
1. Download the two files and upload them to a document library in SharePoint of your choice and to which you have permissions over in the site;
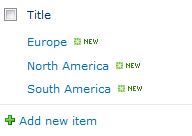
2. Create the first custom list. In the example, I'm going to name it lookupRegion. Then I'm going to modify some settings, such as removing the ability to attach files, as well as adding a description ("This is the region name") and enforcing unique values for the Title column. Then I'm going to add a few values in there:
I'm going to give an example for region and country. You can replace this with any other options that fit your needs.
You are going to need the following:
- 2 custom lists (one of the region and another one for the country)
- Document library or list that will use the 2 custom lists mentioned in the bullet above
- Document library where to save your code to
- jQuery (you can download it from here: http://docs.jquery.com/Downloading_jQuery)
- SPSServices jQuery (you can download it from here: http://spservices.codeplex.com/releases)
I managed to make it work using jquery-1.8.1.min and jquery.SPServices-0.7.1a.min. You may want to try other versions if it doesn't work for you. Sometimes it's a bit of trial and error, like with many SharePoint things.
1. Download the two files and upload them to a document library in SharePoint of your choice and to which you have permissions over in the site;
2. Create the first custom list. In the example, I'm going to name it lookupRegion. Then I'm going to modify some settings, such as removing the ability to attach files, as well as adding a description ("This is the region name") and enforcing unique values for the Title column. Then I'm going to add a few values in there:
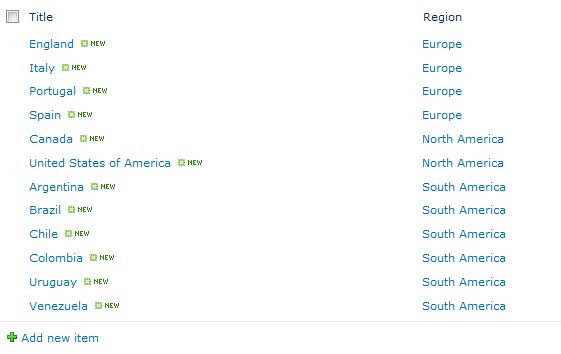
3. Create the second custom list. In the example, I'm going to name it lookupCountry. Then I'm going to remove the ability of attaching files (in the list settings) and then I'm goint to make some changes to the Title column, as well as create a second column, as follows,
Title: Add a description ("This is the country name") and enforce unique values;
Region: Create a region column; this column is a lookup column to the Title field in the lookupRegion custom list and it is a required column (you want to make sure that a region is provided).
4. Add a few values in this list:
5. I will now create a Regional Files document library (you can create a list if not) and I will create one column named Region (lookup column to the lookupRegion list Title column) and another column named Country (lookup to the lookupCountry Title column.)

6. Using Notepad, create a file and type in the following:
<script language="javascript" src=" /URL_to_your_code_location_on_your_SharePoint_site/jquery-1.8.1.min.js"></script>
<script language="javascript" src=" /URL_to_your_code_location_on_your_SharePoint_site/jquery.SPServices-0.7.1a.min.js"></script>
<script language="javascript" >
$(document).ready(function() {
$().SPServices.SPCascadeDropdowns({
relationshipList: "lookupCountry",
relationshipListParentColumn: "Region",
relationshipListChildColumn: "Title",
parentColumn: "Region",
childColumn: "Country",
debug: true
});
});
</script>
Note: Replace the text in blue above with the URL to the location of your files on your SharePoint site. I prefer to use absolute URLs.
7. Save the file under the name of cascadingdropdown.js (this is very important).
8. Upload this file to the same library where you saved your other jQuery files, or to any other library of your choice.
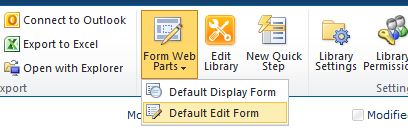
9. Go back to the Regional Files document library and select Default Edit Form from the Form Web Parts icon in the Customize Library section of the ribbon.
<script language="javascript" src=" /URL_to_your_code_location_on_your_SharePoint_site/jquery-1.8.1.min.js"></script>
<script language="javascript" src=" /URL_to_your_code_location_on_your_SharePoint_site/jquery.SPServices-0.7.1a.min.js"></script>
<script language="javascript" >
$(document).ready(function() {
$().SPServices.SPCascadeDropdowns({
relationshipList: "lookupCountry",
relationshipListParentColumn: "Region",
relationshipListChildColumn: "Title",
parentColumn: "Region",
childColumn: "Country",
debug: true
});
});
</script>
Note: Replace the text in blue above with the URL to the location of your files on your SharePoint site. I prefer to use absolute URLs.
7. Save the file under the name of cascadingdropdown.js (this is very important).
8. Upload this file to the same library where you saved your other jQuery files, or to any other library of your choice.
9. Go back to the Regional Files document library and select Default Edit Form from the Form Web Parts icon in the Customize Library section of the ribbon.
10. Insert a Content Editor Web Part to the page. Edit the web part, give it a meaningful name, remove the chrome, and select hidden in the Layout section. Then reference to the cascadingdropdown.js file (in the Content Link section of the tool pane.) Apply your changes and save ([OK]) the web part. Save and close the page.
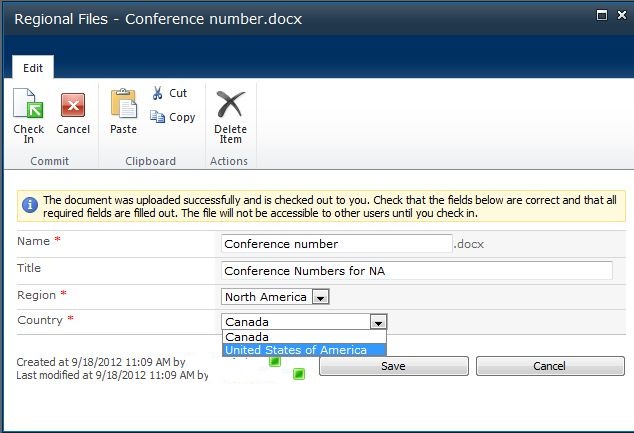
11. Upload a file and see if it works. The image below shows that it works for me.
11. Upload a file and see if it works. The image below shows that it works for me.
Some last explanations about the parameters used:
relationshipList: This is the name of the list where we have kept the relationship (in our example, lookupCountry);
relationshipListParentColumn: This is the parent column (Region) in the relationship list (lookupCountry);
relationshipListChildColumn: This is the child column (Title) in the relationship list (lookupCountry);
parentColumn: This is the parent column (Region) in the library (or list) where we want to implement this (Regional Files);
childColumn: This is the child column (Country) in the library (or list) where we want to implement this (Regional Files).
 RSS Feed