One request we frequently receive is to display fly-out menus, the Top Nav in place of the Quick Launch, or both. I recently found a way to completely move the Top Nav to display where the Quick Launch would normally display and hide the Quick Launch at the same time. This is what I did.
1. Make a copy of the v4.master master page, check it out, rename it, and open it to edit it;
2. Assuming you have still not made any changes to your copy of the v4.master content, go to line 377.
1. Make a copy of the v4.master master page, check it out, rename it, and open it to edit it;
2. Assuming you have still not made any changes to your copy of the v4.master content, go to line 377.
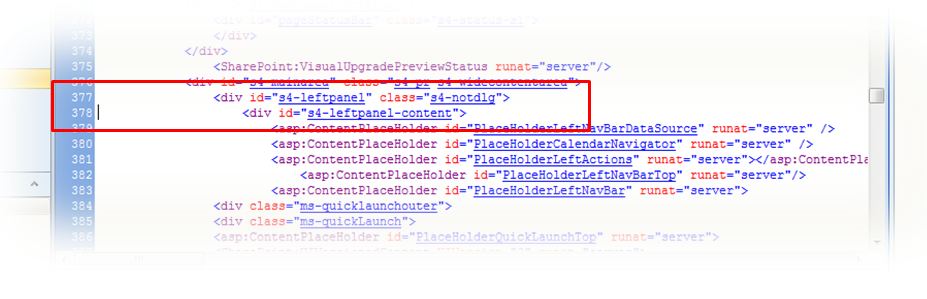
3. I like inserting notes for future reference. So in this particular case, I'm going to insert a comment in between lines 377 and 378, as follows,
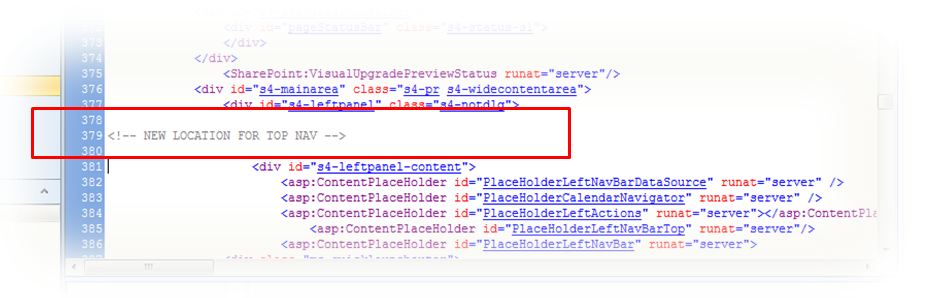
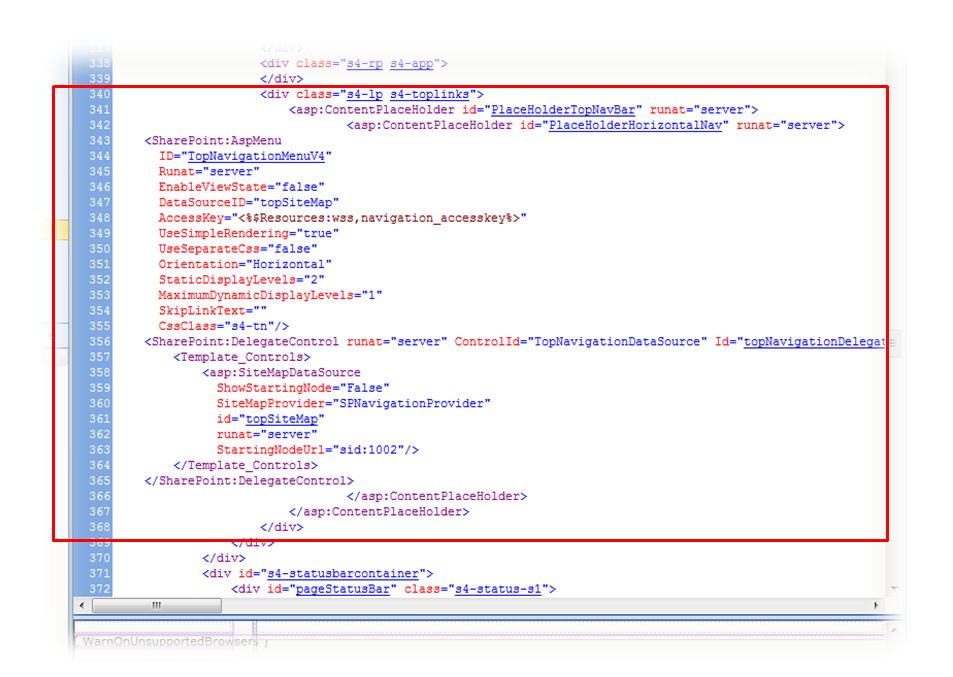
3. Once again we're going to assume you have still not made any further changes to your copy of the master page. Scroll back up and go to line 340. Select lines 340 through 368 and move this to where you inserted your comment for the Top Nav's new location.
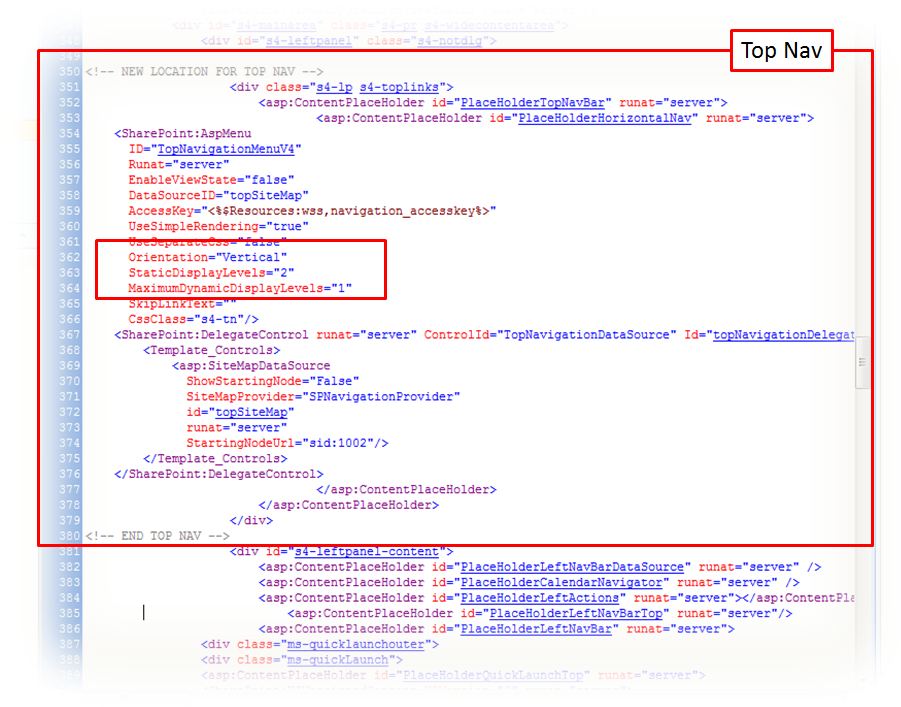
4. Now you need to change the Top Nav orientation from horizontal to vertical. In the sample image below, this is done at line 362. Change the default setting where it says Orientation="Horizontal" to Vertical. You can also make adjustments to the static and dynamic display levels and maximum based on your site needs.
5. We also need to hide the Quick Launch so it only displays the Top Nav. To do this, scroll back to the top of your copy of the master page and locate the closing </head>. Once again we'll assume you have not made any other changes that the ones included in this blog post. Therefore, the closing </head> tag should be located at line 35. Insert a line or two between lines 34 and 35 and type in the following,
<!-- BEGIN ADDED LINES TO HIDE QUICK LAUNCH -->
<style type="text/css">
#s4-leftpanel-content
{
display:none;
}
</style>
<!-- END ADDED LINES TO HIDE QUICK LAUNCH -->
6. Save, check in, publish, and approve the page.
Note: If you need to further customize the site for other colours than the ones used by the SharePoint theme applied to the site, you will need to further modify your copy of the master page to register your external CSS file and make a copy of the corev4.css CSS file where you can made your customizations. To learn how to register your external CSS file on your master page, visit my blog post here. For a clean copy of the corev4.css file, visit my Useful Files section.
Hint: The following is a list of the main CSS classes that control the look and feel for the Top Nav:
- .s4-tn
- .s4-tn ul.static
- .s4-tn li.static > .menu-item
- .s4-tn u.dynamic
- .s4-tn li.dynamic > .menu-item
- .s4-tn li.dynamic > a:hover
- .s4-tn li.static > a:hover
- .s4-toplinks .s4-tn a.selected
- .s4-toplinks .s4-tn a.selected:hover
 RSS Feed